
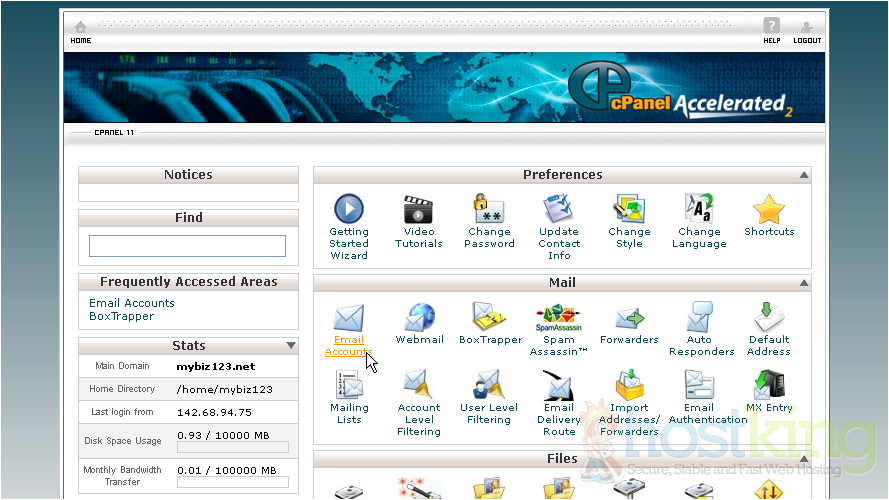
This demo assumes you’ve already logged in cPanel
1) Click the Email Accounts icon
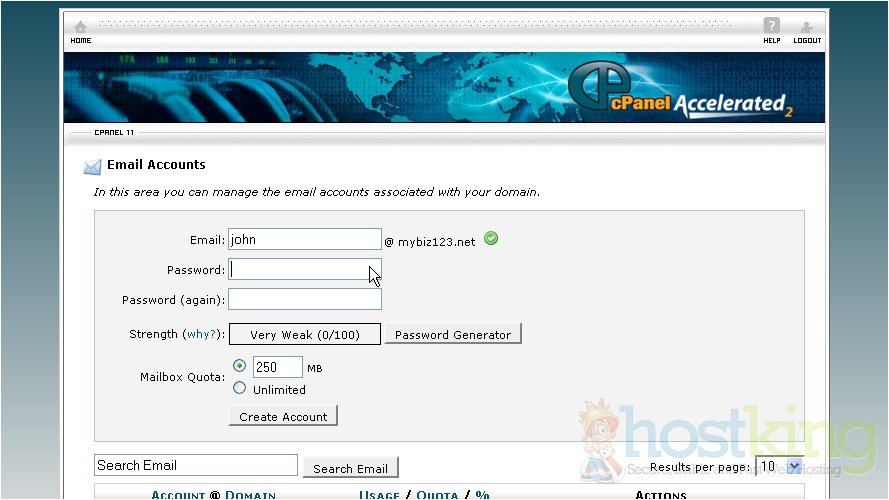
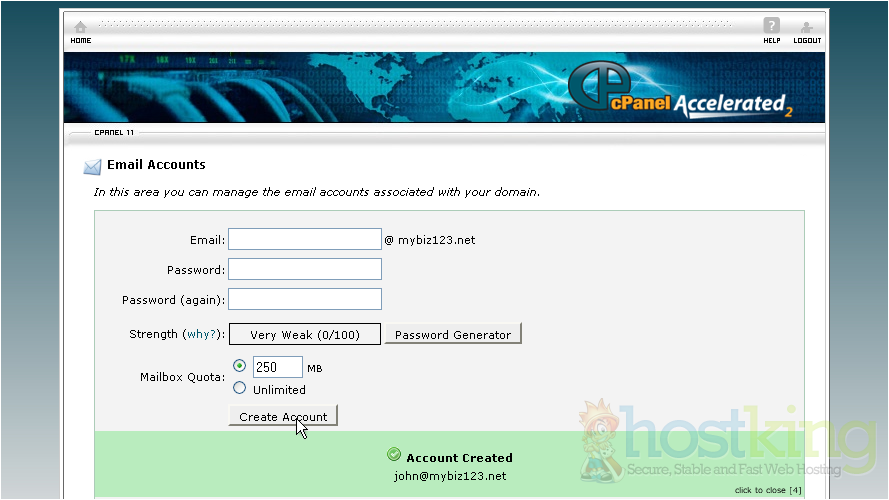
2) Enter the new email address here
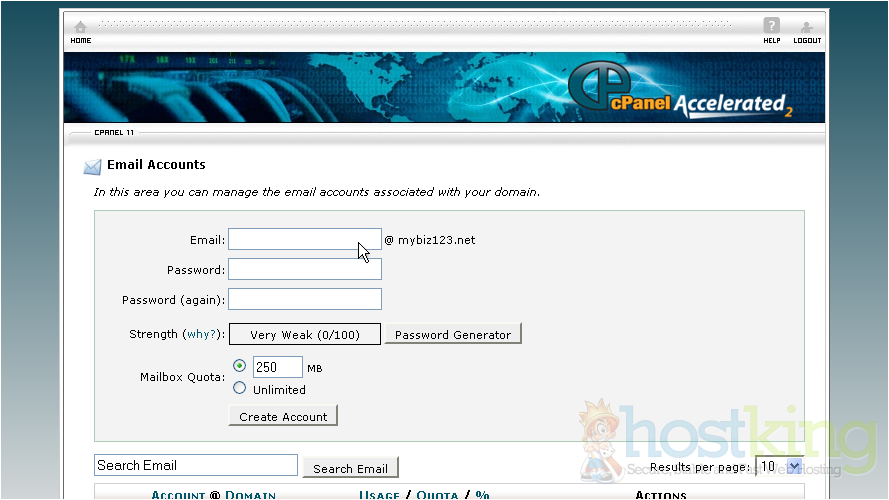
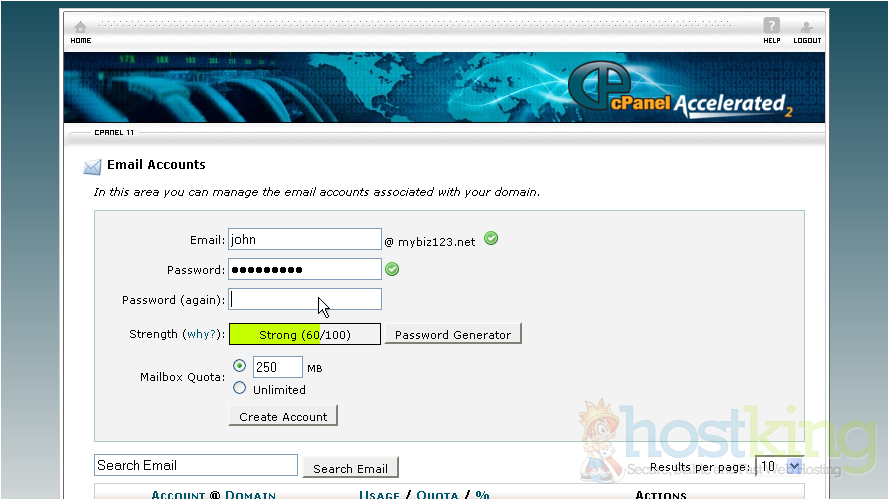
3) Enter and confirm a password for the email account
4) If you want to set a quota limit for the account, you can do so here. Then, click Create Account
That’s it! The new email address has been successfully created
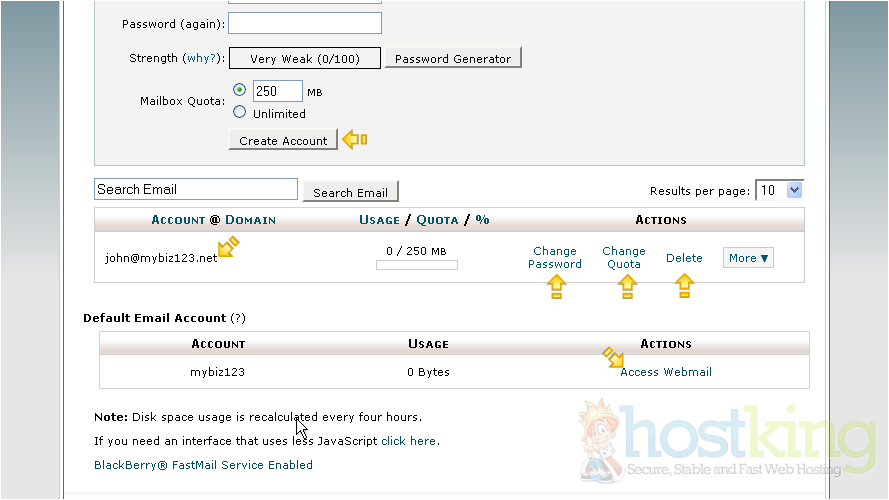
From here we can access web mail, change the email password, change the quota, or even delete the account. You can also create additional email accounts
This is the end of the tutorial. You now know how to create POP email accounts with cPanel
Comments